
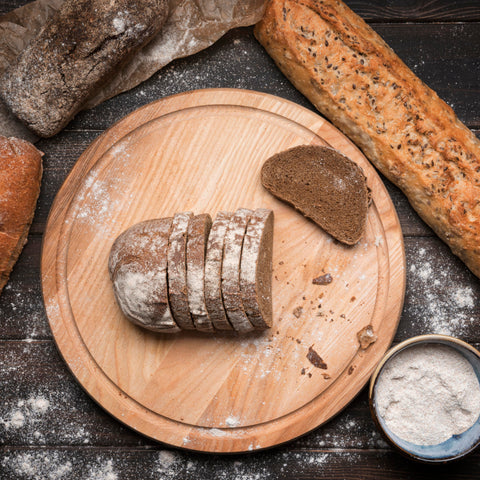
There's something wonderful about preparing bread. Flour, water, and time create a crusty, acidic bread with a pleasant scent. Sourdough is a craft, tradition, and science, not simply a bread. And now, with the help of modern tools like the sourdough bread maker by ABIOTO, the journey from simple ingredients to a perfectly sliced loaf is more accessible than ever.
The Rise of Homemade Sourdough Bread
Bread Making at home is becoming more popular. Many of us have fond recollections of our grandparents or great-grandparents hand-kneading the dough on the kitchen counter, seeing it rise, and eating it with jam or butter. Handmade bread is trendy again due to good memories and a desire for healthier, less processed meals.
Sourdough is one of many breads, but its taste and natural fermentation make it stand out. The sourdough starter comprises natural yeast and lactobacilli bacteria, not commercial yeast. Natural fermentation gives sourdough its acidic tang and improves digestion and nutrient absorption.
Crafting Your Own Sourdough Starter
At the heart of every sourdough loaf lies the starter—a living culture of wild yeast and bacteria. Creating your own sourdough starter is like nurturing a small, bubbly ecosystem in your kitchen. All you need is flour, water, a bit of patience, and a dash of TLC.
Process of Sourdough Bread Making: Step-by-Step Guide for Beginners
Start with the Sourdough Starter Kit. Our starter kit includes:
- Sourdough jar
- Silicone spatula
- 3 cloth covers
- 3 thermometer strips
- A day-tracking band
Let's start bread-making.
Create Your Sourdough Starter
To get started, take a clean glass jar and combine flour and water of equal proportions. Cover it loosely with a breathable cloth to allow wild yeast from the air to settle in.
Feed Your Starter
Check the dough, and don't forget to add more flour and water to the previous one. Over the next several days, you'll notice bubbles forming and the mixture developing a pleasantly sour aroma. This means your starter is alive and thriving.
More Feeding and waiting
An increased level of activity, bubbles, and a slightly sour odor should be present in your starter by this point. It is necessary to repeat the process of feeding the starter by discarding half of it and adding one cup of all-purpose flour and one cup of water again. Take a mixture, cover it, and let it sit for another 24 hours.
Starter Ready for Baking
The aroma of your starter should now be tangy and bubbly at this point. The bread dough you are making can now be used! It is customary to measure out approximately one cup of starter for each recipe that you intend to use. You can transfer the remaining starter to a clean jar and then place it in the refrigerator to keep it fresh. It will require that you feed it once a week in order to maintain its life.
Mixing the Dough
Using a large bowl, combine one cup of active sourdough starter, three cups of bread flour, and one and a half cups of water. After the dough has been mixed, it should be covered with a kitchen towel for thirty minutes until it becomes shaggy. After thirty minutes, add one and a half teaspoons of salt to the dough and gently knead it. The dough should be stretched and folded every half hour for the first two hours, after which it should be covered and let rest at room temperature for a total of four hours.
Shaping and Proofing
After the bulk fermentation, lightly flour your work surface and turn out the dough. Gently shape the dough into a round loaf, being careful not to deflate it too much. Place the shaped dough into our sourdough proofing basket set with banneton bread proofing baskets. This will provide an ideal sourdough loaf shape to the dough. Cover it with a cloth towel you get in your kit and let it proof at room temperature for 2-3 hours, or until it has visibly risen.
Properly Baking Sourdough
- Place a baking stone or Dutch oven inside the oven and preheat it to 450 degrees Fahrenheit (230 degrees Celsius).
- Let this process take around half an hour. Immediately after the dough has proofed, carefully transfer it to a sheet of parchment paper.
- In order to enable the dough to expand, you should cut the surface of the dough with a sharp knife.
- Sling the dough onto the parchment paper, and then gently set it on the baking stone or into the Dutch oven that has been prepared.
- Cover and bake for 20 minutes for a golden brown crust and a hollow sound when tapped on the bottom of the loaf.
- Next, remove the cover and continue baking it for an additional 20-25 minutes.
The Role of the Sourdough Bread Maker
The process of making sourdough bread by hand typically involves kneading, folding, and shaping, but the sourdough bread machine has simplified it without compromising quality.
These gadgets simplify bread baking with preset mixing, kneading, rising, and baking procedures. Several clicks can produce a fresh, warm loaf of sourdough, ready to slice and enjoy.
Convenience makes sourdough bread makers appealing. Homemade bread is now accessible to busy people. Put your ingredients in, choose your parameters, and let the machine operate. The smell of fresh bread will soon welcome you.
Crafting the Perfect Loaf
Whether you're using a traditional method or a sourdough bread maker, certain principles remain the same for crafting the perfect loaf of sourdough bread.
- Quality Ingredients: Start with high-quality flour, preferably bread flour or a mix of bread and whole wheat flour for added flavor and nutrition.
- The Starter: Ensure your starter is active and bubbly before using it in your dough. A mature starter will give your bread the best rise and flavor.
- Hydration: Sourdough bread benefits from a slightly higher hydration level, creating those coveted holes and a chewy texture.
- Folding Technique: Instead of vigorous kneading, try the gentle folding technique. This helps develop the gluten without overworking the dough.
- Patience: Sourdough is not bread to rush. Allow for adequate fermentation and proofing time to develop the flavors fully.
- Baking: Preheat your oven with a Dutch oven inside for the best crust development. A steamy environment at the start of baking creates that iconic crispy crust.
Bringing It All Together
As you bake, remember that your sourdough bread will be unique. The hard crust, somewhat crooked shape, random holes, and general imperfection of baked bread make it lovely. It demonstrates your passion and dedication to art.
Making bread becomes fun and rewarding with a sourdough bread machine. From mixing the ingredients to cutting the bread, every step celebrates tradition and flavor.
Whether you're an experienced baker or just starting out, try homemade sourdough. Once you get the hang of it and get the right equipment, you can give your loved ones freshly baked loaves made with care and a sense of magic.
Ready to get started?
Check out ABIOTO for the best sourdough bread makers if you're ready to start. We have everything you need to enjoy homemade sourdough bread, from beginning models to advanced alternatives for experienced bakers.
Enjoy the smell of fresh bread and the flavor of zesty, crusty loaves in your kitchen. With your sourdough bread machine, you start from scratch and slice.
Happy baking!

Comments (0)
There are no comments for this article. Be the first one to leave a message!